Field Level Add Data Option - Management Zone Boundary
Management Zone Shape Files may be uploaded to the field through the field level "Add Data" menu.
- Right-click over the field name within the profile tree.
-
A small white menu will appear, select "Add Data".

- The "Data Upload" window will appear; Select Data type: "Management Zone Boundary" and click "Choose File".
- A Windows Explorer window will open, Use window to navigate to Management Zone file within the computer, and click to select it. Please Note: The Shapefile needs to be in a Zipped Folder.
- Click "Open".
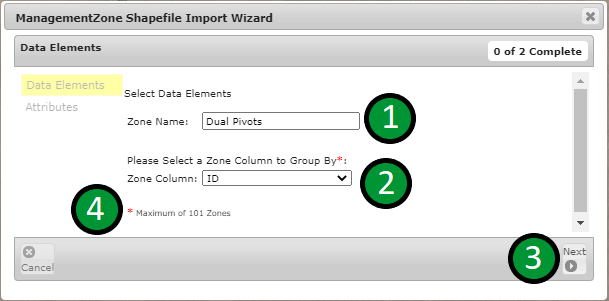
- "ManagementZone Shapefile Import Wizard" will open. See image below.
- Type a "Zone Name"[1] into the input field (the layer will be labeled by this name).
- Using the "Zone Column"[2] drop down select the Management Zone Indexing column (the column header for the column in the file that contains all the zone names/IDs). Please Note: The content in this drop down menu is populated directly from the column headers present in the file being uploaded. The Zone column being selected needs to be a positive whole number to import successfully.
-
Click "Next"[3]. Please Note: There is a "101 Zone"[4] maximum limit on import, files exceeding this number will fail to import.
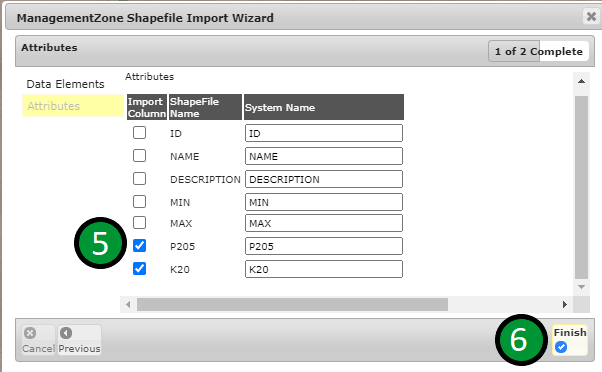
- The Attributes section of the ManagementZone Shapefile Import Wizard will open. See image below.
- Select any attributes to import as a data column by clicking the check box[5] that appears before the attribute.
-
Click "Finish"[6].
|
|
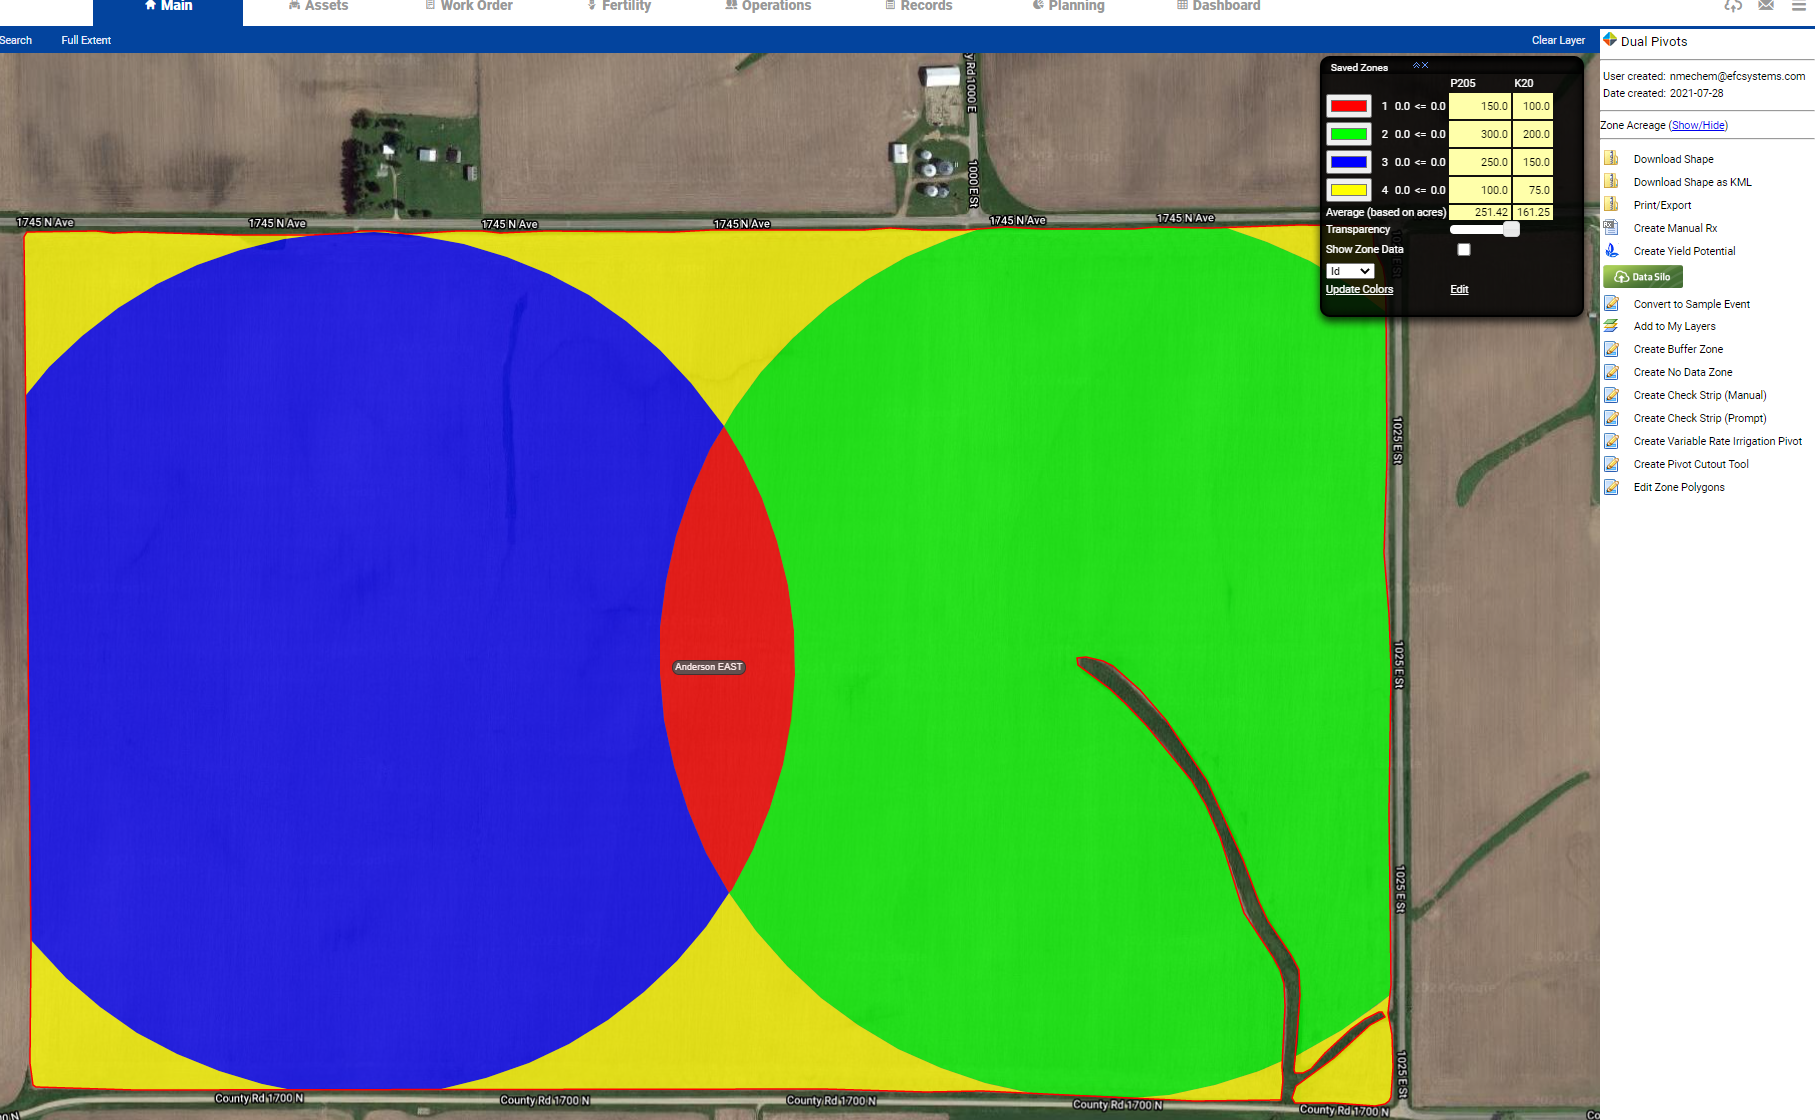
Example of Imported Management Zone
|
|


