Field Level Add Data Import - Field Trial
Once Chemical, Fertilizer, or Programs have been created by the Field Trial Tool, the Field level "Add Data" option: "Field Trial" may be used to set up all the other details for the field trial. Follow steps below
Creating a Field Trial on a Field
- In the Main tab, expand the profile tree down to the desired field level.

- Right-click the field name within the profile tree and select "Add Data".
- The "Data Upload" screen opens. Select Data Type: "Field Trial".
- Input a name for the field trial.
- Select a Program.
Please Note: Programs available in this drop down menu are populated by their entry within the Field Trial tool. - Under "Upload Boundary" section, the "Choose File" button allows for the selection of a boundary shape file to be associated with the field trial. If no boundary is selected, one may still be uploaded or drawn later.

- Click "Add/Upload".
- A field trial folder (if none exists), and field trial entry will be created on the field. See image below:


Field Trial Summary
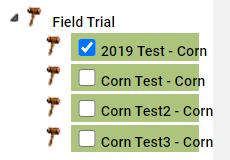
- Expand the field, and the field level Field Trial folder. Click the check box in front of the Field Trial Layer to select it. See image above.

- On the right-hand gray panel, current stats for the Field Trial display. Click the blue link for Program: to view chemical program details. (See image on right.)
- Select "Field Trial Summary" from the drop-down menu on the right-hand side gray panel and click "Go" to generate it. Field Trial Summary will be delivered in a separate browser "pop-up" window, where it may be saved or printed.

Field Trial Analysis
If there is yield data available for the field, a Field Trial Analysis may be ordered. Follow steps below:
- Expand the field, and the field level Field Trial folder. Click the check box in front of the Field Trial Layer to select it. See image above.

- On the gray right-hand side panel, observe "Field Trial Analysis" option showing within the drop-down menu then click "Go".
- The "Field Trial" menu window opens. (See image on right)
- Fill out all desired inputs from the Field Trial menu window. These inputs will be used as variables for analysis.
- Click "Run"
- Field Trial Analysis will be delivered in a separate browser "Pop-up" window, where it may be saved or printed.

Drawing Field Trial Boundary
- Expand the field, and the field level Field Trial folder. Click the check box in front of the Field Trial Layer to select it.

- From the "Field Trial Analysis" drop-down menu, select Draw/Edit. Then click "Go".
- Click anywhere within the red boundary area of the field to place down a vertex box. (This begins the boundary drawing action)

- Continue clicking until area for field trial has been mapped by boundary
- Click the "Save" in the upper left-hand corner of the screen.


Uploading Field Trial Boundary
- Expand the field, and the field level Field Trial folder. Click the check box in front of the Field Trial Layer to select it.
- From the "Field Trial Analysis" drop-down menu, select "Upload Boundary" and click "Go".


- The system opens "Upload Boundary" window; click "Choose File" then search through computer to find and select boundary file to be uploaded.
- Once boundary shape file is selected, click "Open"
- Back on the "Upload Boundary" window, click "Add/Upload" button.

