Grower Level Add Data - Profile/Boundary
The Grower level Add Data menu option "Profile/Boundary" will import farm level boundary data shape files.
- In the Main tab, expand down to the Grower level.
- Right click over the grower name within the profile tree.
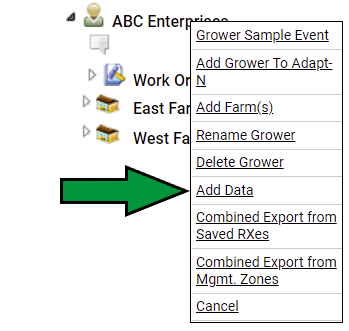
- Select option "Add Data"
- "Data Upload" window opens, from "Data Type" drop down menu select: "Profile/Boundary".
 Click "Choose File" button. Click "Choose File" button.
- An exploratory window to the computer being used will open.
- Select the boundary file and then click "Open" button.
- Back on "Data Upload" window, click "Add/Upload" button.
- Window below will open.
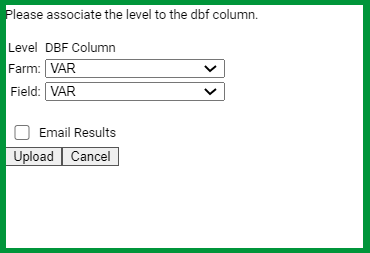
- Use "Field" drop-down menu to select the field column name within the .dbf portion of the file.
- Use "Farm" drop-down menu to select the farm column name within the .dbf portion of the file.
- Click "Upload" button.
Please Note: For larger boundary shape files, "Email Results" check box will send an email alert to the user currently logged in when all boundaries have been uploaded.
|
|

 Click "Choose File" button.