Adapt-N - Getting Started
Adapt-N provides custom Nitrogen recommendations through integrated services within FieldAlytics. Users may enroll field boundaries to Adapt-N, configure those boundaries, and receive back the most up-to-date custom Nitrogen recommendation available.
Enabling a User Account for Adapt-N Purchasing
1. Activate the Adapt-N integration within Administrative Tool: " User Admin".
2. Select a user, then click " Advanced Permissions" tab below.
3. Click the " Adapt-N Purchaser" check box below.

4. Click the " Save Changes" button in the lower right of the Administration tool.
Please Note: Utilizing the Adapt-N functionality comes with a per acre fee, contact your sales representative for pricing.
Configuring a Field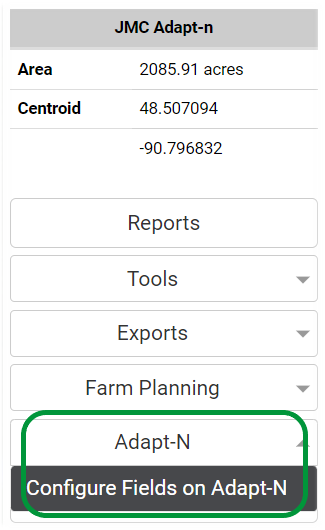

- To start, click the Adapt-N section and select Configure Fields on Adapt-N. This option is available at the Grower, Farm, and Field Levels of the profile tree.
- The configure window will display currently enrolled fields with a check mark.
- For any fields setup with a Crop Area definition of "Corn" for the current season, a helpful corn icon will display to the far right allowing the user to easily identify the appropriate fields for possible selection.
- To enroll a field or fields, click on the box to the left of the field name and click Enroll Selected.
- Fields that are already enrolled will be highlighted green, fields that are selected will appear orange, and fields that are not enrolled will appear white.
- Clicking on a box to the left of a Grower name or Farm name will select all of the fields under that level.
- Users may also enroll individual fields by clicking on the menu box to the right of an field and selecting enroll

- Next click on the menu icon to the right of the field name to open the configuration settings window for submitting the field to use Adapt-N.

- Each category in the configure field tool will be have three columns;
- Configured status (Configured or Unconfigured)
- Required/ Optional- categories without the (required) denotation are optional
- Variable/ Constant- categories marked (variable) allow the use of management zones while categories without the variable denotation are whole field attributes
- Click on a category will expand the box to reveal the required inputs.
-
For "(variable)" labeled categories, there is a By Zone selection (under "Constant Value"). When clicked, the By Zone button allows for a management zone and data column to be selected, and then separate per-zone inputs to be configured.

- A few variable categories have additional options apart from the By Zone option
-
Expected Yield- allows the selection of a Yield Potential. Click on Yield Potential, then select the desired Yield Potential from the new drop down list.

Soil OM, Soil pH, and Nitrate Test- all of these categories allow the use of most recent sample. Selection of this action button will automatically pull in the element data from the fields most recent field sample event.

Fertilizer Application - allows users to configure an application(s) as flat rate (Constant), By Zone, or from a Saved Rx.

- Select the desired Saved Rx from the Variable Selections section.
- Please note, Rate* is input in units of elemental N, not product rate
-

-
Map the products of the saved Rx by first selecting the Nitrogen product used from the Saved Rx Products and then matching it to an Adapt-N Product.

- Select the desired Saved Rx from the Variable Selections section.
-
- The Application categories(Irrigation, Manure and Fertilizer) behave differently. These three categories do not display a Configured/ Unconfigured status. Users may enter the information for the applications like the previous inputs, however, once the configurations are saved, the inputs will clear allowing for an additional application to be entered.
- Users may view previously submitted applications by clicking on the drop-down menu on the left side of the box and selecting the desired application.
- Previous applications may also be edited and saved as a new application to update the Adapt-N model.
- Fertilizer Application - Multiple applications can be entered simultaneously, once the first application is configured, click the green "+" icon to add it to the configuration
- Subsequent applications can then be entered in the configuration modal
- Added, but not yet saved, applications will be displayed within the 'New Application' dropdown denoted with "**" next to the date
- On save, all configured applications will be sent to the Adapt-N model
- Click Save to finish. Configuring/ editing a configuration will not automatically trigger Adapt-N to run a recommendation. Users must select the Get Most Recent Rx button from the dashboard or from the right side Adapt-N menu. Once returned the recommendation will be stored under the field level for viewing in the Main tab. See our help article Viewing Adapt- N Recommendations for more information.


Multi-Field Configuration
From the Grower and/or Farm Level, access the "Adapt-N" tool option. The system will then display all current mapped fields with a shaded boundary. Select any desired fields that is showing in Green, which indicates that they are already enrolled. Once your fields have been selected, you will then be presented with the option to "Configured Selected".

The system will now open the "Configure Multiple Fields" input modal. Within this screen, user will be able to apply any of the optional and/or required field level input configurations to all selected fields at one time. Additional break-out functions will then be presented to allow users to locally configure any of the "Variable" input configurations which would all be field specific.

As the user progresses, any of the "required" input that have had a selection identified, will then have the name display text update from a Red color to Black. This will visually help indicate to the user any needed/remaining required inputs.

Once all Configuration Items have been set, the user can then select the "Save" button. This will store the Field(s) configuration and then make available the "Update Recommendation" button. Select this and the system will manually reach out to the Adapt-N service and retrieve the current Nitrogen Recommendation based on the provided inputs.
Once a field has been saved, the system will then begin to automatically update the recommendation with a daily/nightly pull. This will then ensure that under any enrolled/configured fields, a current recommendation is always available factoring in both the users supplied configuration inputs, as well and the latest Adapt-N modeled data and values.

Configuring Adapt-N Defaults
Once a field is fully configured you have the option to change the Adapt-N default values pre-loaded from Adapt-N. It is not recommended that users change these values. The option to change these layers is available for users who have a reason to make a change. There are 3 layers that can be changed at this spot; Soil Type, Soil Slope, and Rooting Depth.
Accessing Adapt-N Defaults
1. In the Main tab, on the Field level, click the "Adapt-N" button from right side panel.
2. Select "Adapt-N Defaults".

3. The window that appears looks like the configuration window for the rest of the Adapt-N attributes but only contains 3 sections.

- Soil Type: Soil Type can be changed at this level to one of the soil type values available in the pull down. These soils are populated by adapt-N and cannot be changed and are dependent on region and will change from region to region. Any change to soil type will reset the rooting depth to match.
- Well Drained – Select this if the field does not flood regularly.
- Constant – This will change the whole field along with the rooting depth to the soil type selected. Rooting depth is connected to Soil Type so even if you change rooting depth, if you change soil type after rooting depth the rooting depth will change back to what the soil default is. For this reason, if you are changing the soil type and the rooting depth, change the rooting depth last.
- Reset Default – This will reset the field to the default soil type layer that Adapt-N originally had in the field. This will also reset the rooting depth to match the soil type.
- Soil Slope: Slope inside of Adapt-N will be categorized into 4 categories.
- Constant – A user can change the slope of a field to one of the 4 categories
- By Zone – A user can utilize a management zone of a slope layer to load into Adapt-N. Your data will be categorized into the same bucket ranges that are available in the constant list.
- Reset Default – This will reset the field and utilize the default layers first set by Adapt-N at the time of enrollment.
- Rooting Depth: Rooting depth is automatically set based on the field location, soil texture, and drainage status. You can adjust the default rooting depth deeper or shallower, or set it to a constant value across the entire field.
*Changes made to the rooting depth will be reset/lost if you later modify your soil type layer.
- Constant – A user can change the constant rooting depth of a field to one of the categories listed.
- By Zone – A user can utilize a management zone to adjust the rooting depth. The inches set in each zone will be placed into the category they fall when added to Adapt-N.
- Reset Default – This tool will reset all values to the default settings in Adapt-N. You can also use this tool to adjust all values of the rooting depth by a range. You could choose to adjust all rooting depths shallower by x inches or deeper by x inches. This is used when users feel the rooting depth doesn't represent what the environment may be for a field. If compaction is present for instance.
